
From our California Material Girl…
That’s what I told Kristin when she suggested that I try on a dress that had been made for club. The dress had a large ruffle that went around a scoop neckline – Kristin may remember better than me the details. But all I saw was a large ruffle and being 5′ 3″ – it looked like I could be swallowed up by it! What would have been more accurate for me to say is, I don’t wear large ruffles – I know, silly rule – but don’t we all have some clothing rules? So, now that I’ve confessed to putting my foot in my mouth – here are a couple of garments where I’ve recently added ruffles to necklines.
I feel like there have been two large trends out there for awhile now – ruffles or the drape front look. I’m not much of a drape girl – again small in stature, I feel a bit enveloped by too much drape. I figure I can add a ruffle to any garment and keep it within my comfort level.
So, the first is a cardigan. This is the basic Kwik Sew pattern – once you get it fitted to your shoulder, arm and torso length – you’re good to go, add or change whatever you want- it’s easy with this pattern. I pulled the ruffle piece from Simplicity 2256. I had in mind this lush, double sided, purple knit that I picked up on the Sillouette NYC Fabric trip. I wanted some way to show off both shades of the fabric and I thought a ruffle could do that nicely. The ruffle from the Simplicity pattern was the perfect length and shape, the only adjustment I made was I wanted the edges to be left raw. I followed the pattern’s direction for construction of the neckline ruffle and I have to say – it was very difficult to gather two layers of knit fabric with a seam down the middle. If the fabric was any thicker I don’t know how you would do it. The instructions basically have a seam down the middle of the ruffle and your gathering stitch goes right along side that. After several attempts using a basting stitch on my machine, which kept breaking when I would try to gather the ruffle – I finally hand basted a gathering stitch. This was the most difficult part of the project. Once I had the gathering done, I just had to sew the ruffle to the finished neck line. Easier said than done – again I hand basted the ruffle to the neckline because it got “squirly” with the thickness of the ruffle – and not being able to see where you were attaching the ruffle to the neckline as you were sewing. My finished stitch line along the neck line is not so straight on the inside of the garment – but on the outside you can’t tell. In the end, I’m very happy with the finished cardigan. (the shell underneath is another NYC fabric. I used McCalls 5818- and turned the dress into a shell)
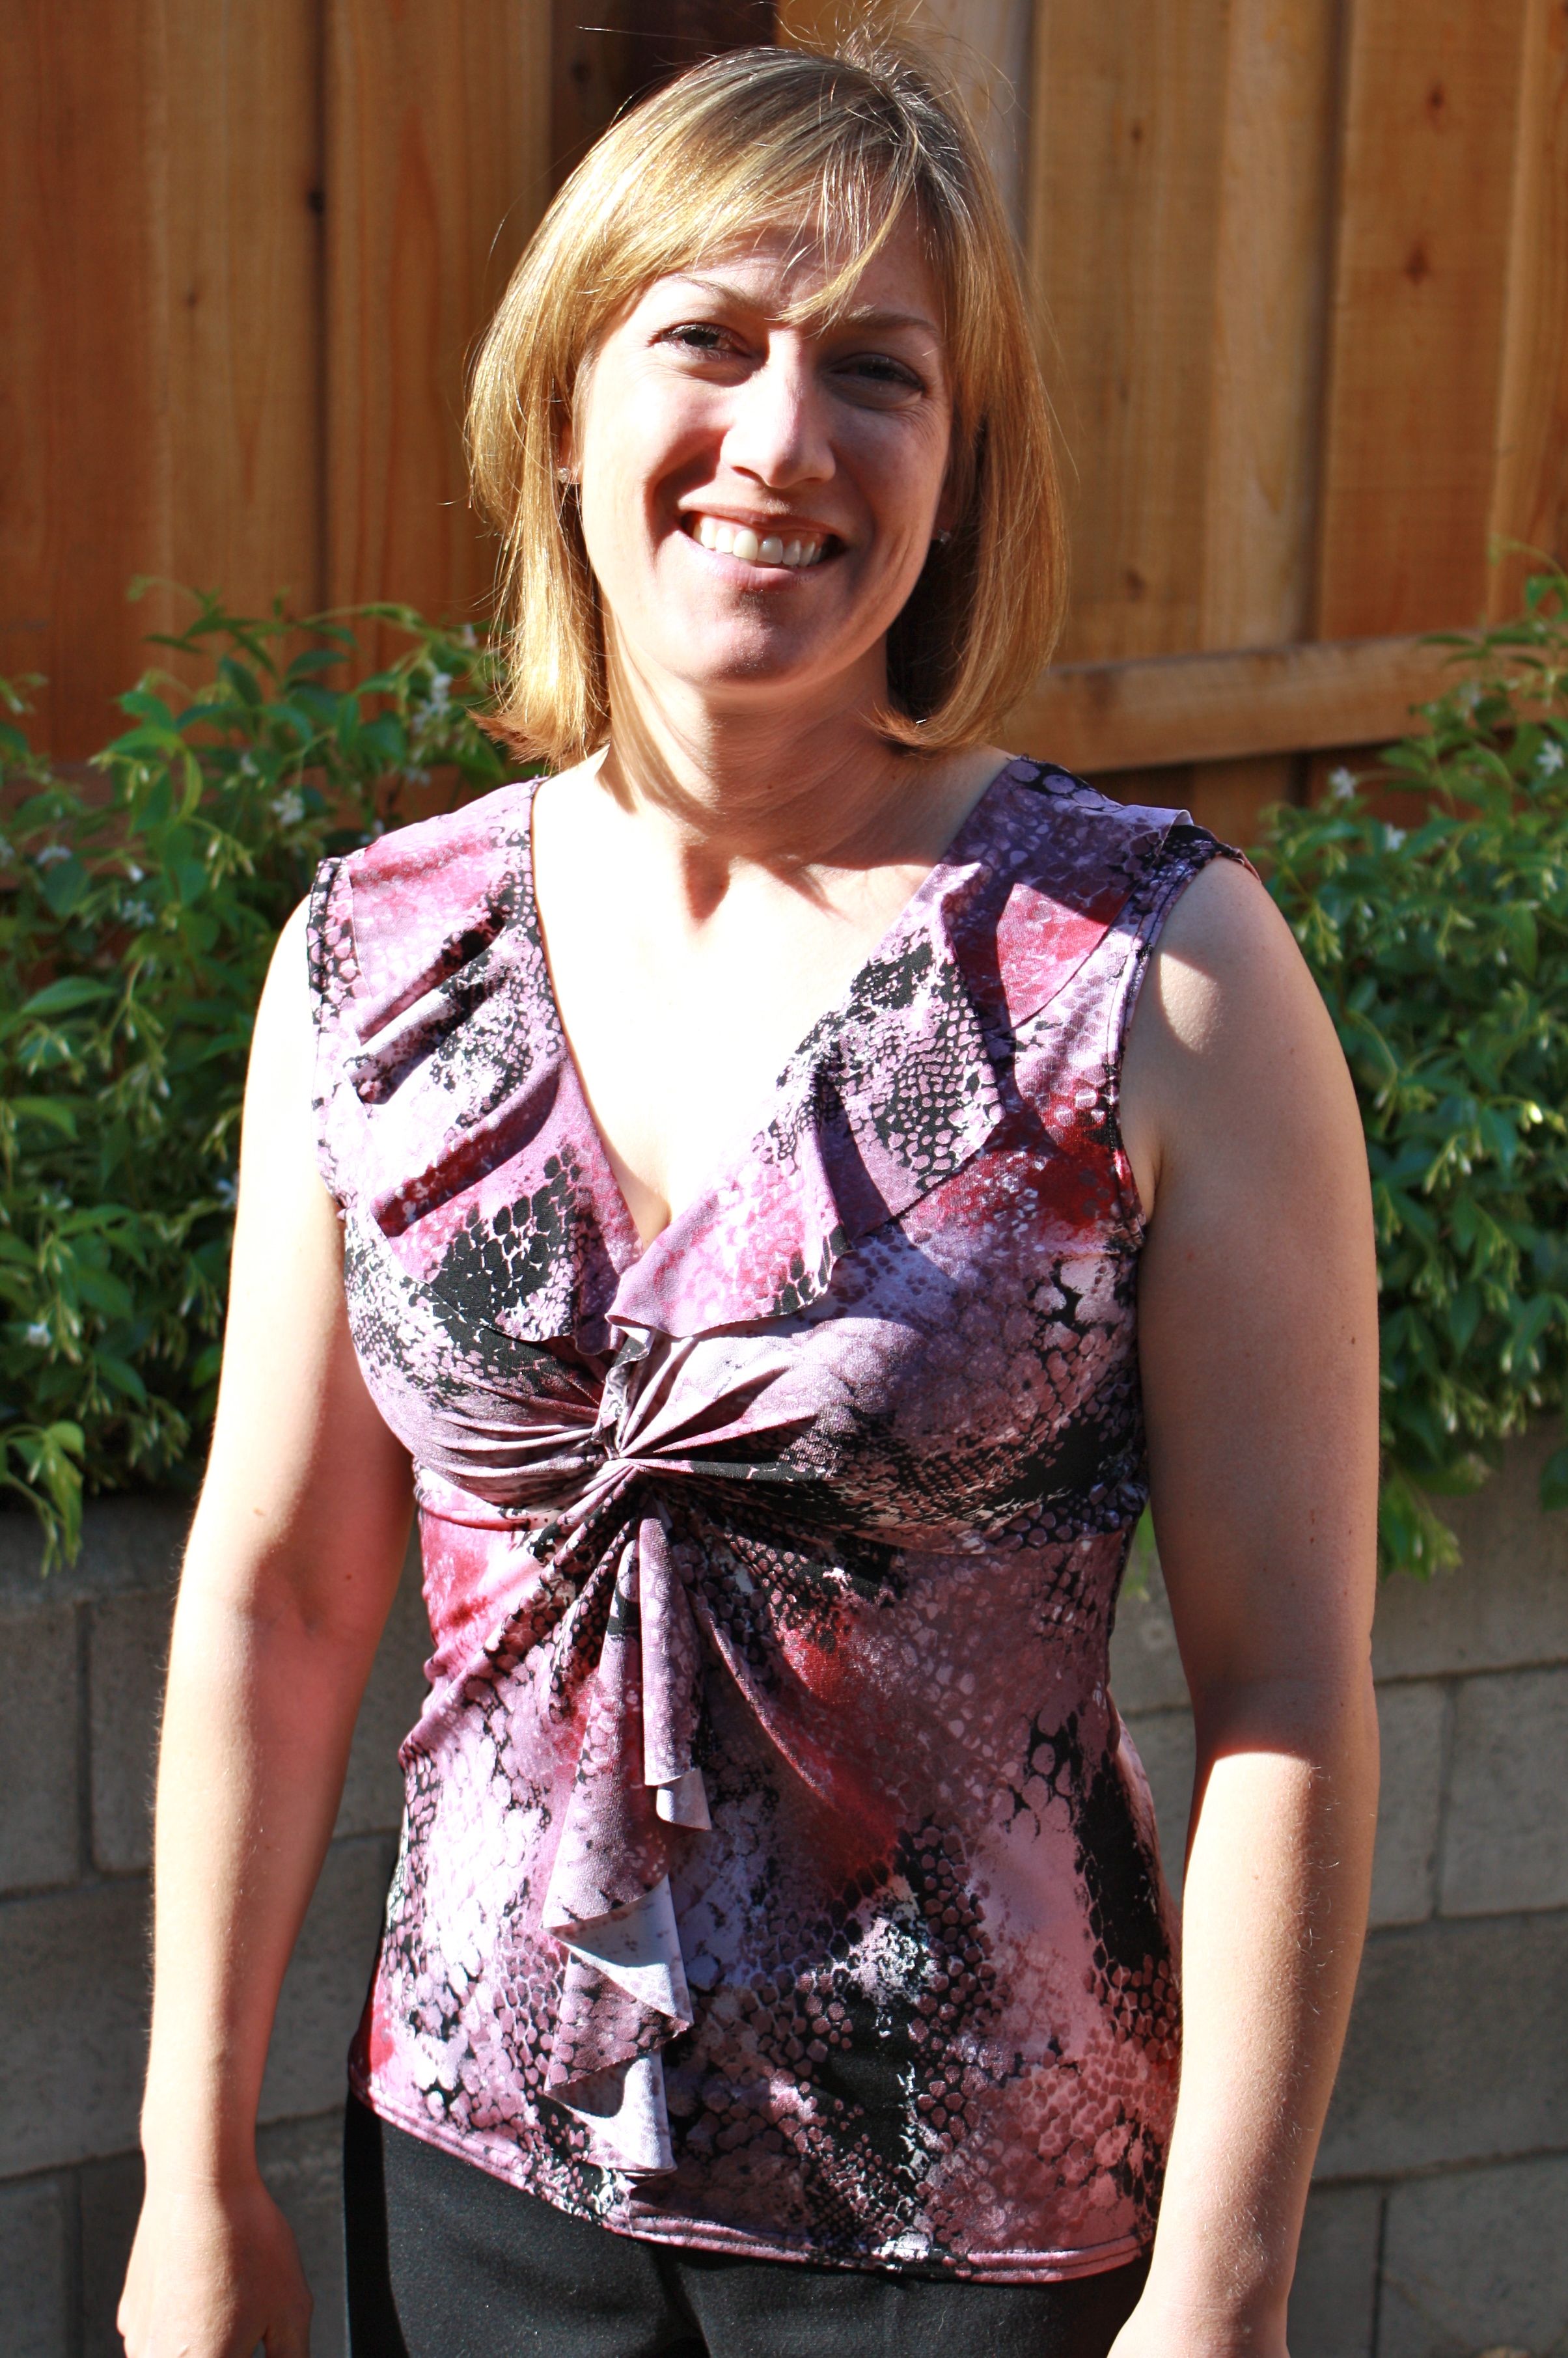
Next is a great tried and true Jalie pattern. I found this crazy fabric online – the description noted that it had a snake skin pattern – when it arrived it didn’t look exactly as I remembered. It was a bit crazier with pattern and color than I expected. I saw a top in a catalog with the flounce bottom and a ruffle around the top. I thought it would be easy to add a ruffle to this Jalie neckline. Well, the first thing I noticed after making up the top is that the Jalie version has a twist neckline and the RTW version did not have this added complexity. The other big difference I realized was that the Jalie pattern has a dipping neckline in the back – unlike the RTW which had a normal round neckline in back. Since I planned to use the Simplicity ruffle pattern again – it would not fit around the back neckline – it was too small and I had already cut it out leaving not enough fabric left over. So I figured I’ll just run a ruffle from the neck to the bustpoint – that didn’t work out so well. In the end I think the ITY jersey I used was too heavy to create a nice full ruffle – it just wanted to lay flat. So, I decided flat it is, and I made my ruffle into a flounce. I used the same pattern piece that is used to create the flounce down the midriff – cut it down a bit in width and added it to the neckline. I had to take out my shoulder seams and top stitching to have the ruffle start at the shoulders. I like the top and now I would be able to make this again quickly. I’d still like to make a version close to the RTW inspiration – but that will have to wait, other projects already ahead of that idea!
P.S. one little tip – lately I’ll carve out some sewing time and cut out 2 or 3 patterns in one setting. Then I have projects ready to go when I have the time to sew – I’ve found that helpful ; )
Both tops were inspired by Cabi – here is the inspiration and my version:


Oooo! I like them both and the ruffles are very proportional to your frame. Nice work!
LikeLike
I was hoping to learn how to use a ruffler to do that. In fact, I stopped over at Treadle and they sent me to your site thinking maybe you knew how to use one. No luck?
LikeLike
I just posted the flounce directions done by Cande/Kenzie today but a ruffler won’t work for her technique. I guess maybe a clarification is needed.
Dictionary.com defines flounce as “a strip of material gathered or pleated and attached at one edge, with the other edge left loose or hanging: used for trimming as on the edge of a skirt or sleeve”.
The same source defines ruffle as “to draw up (cloth, lace, etc.) into a ruffle by gathering along one edge.
Vogue Sewing distinguishes ruffles as straight or circular (no mention of flounce). I think that is the best distinction between a ruffle that is made by gathering (straight) or one that is made by cutting a circle (or donut as Cande called it) and sewing the inside and shorter edge to the garment thus creating a ruffle but no gathers.
Cande’s instructions can get you through making your own circular ruffle or you can buy a pattern that will have it for you.
A ruffling foot (serger or sewing machine) can help you with a straight ruffle as it gathers the fabric for you.
We can help you with either. Give me a call and we can set up a time 🙂
Just an FYI on the flounce that Carrie was originally talking about-I recently tried the dress on and decided the flounce is even too big for me. I’ll post pictures of before and after soon…
LikeLike