
Karen’s Garments:
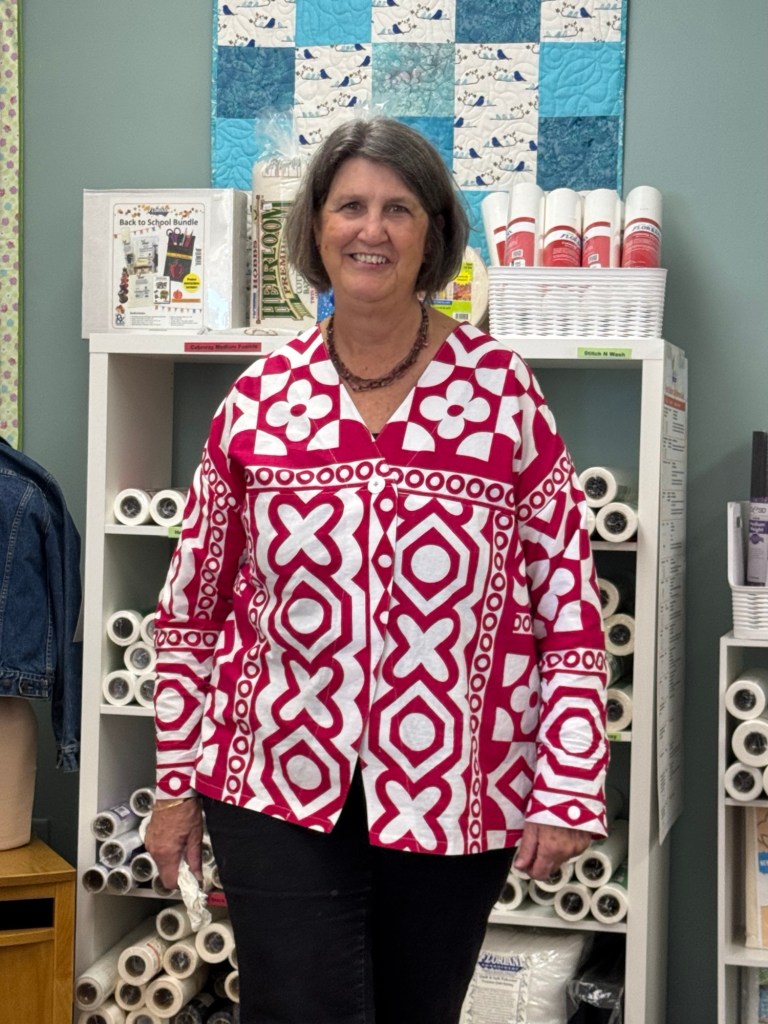
This pattern was published in 2005, so time to see how it works! I want to make a patchwork boiled wool jacket sometime so I tried out this top as a possible pattern to use for that project. I think it will work very well for what I have in mind.
I made up the top just to pattern and it fit fine and is super easy. The only challenge in the project was deciding which pattern piece should be used where on this wild and non-symmetrical print.
This cotton fabric is stiff even after a couple of washings, but the pattern needs some body to hang well.
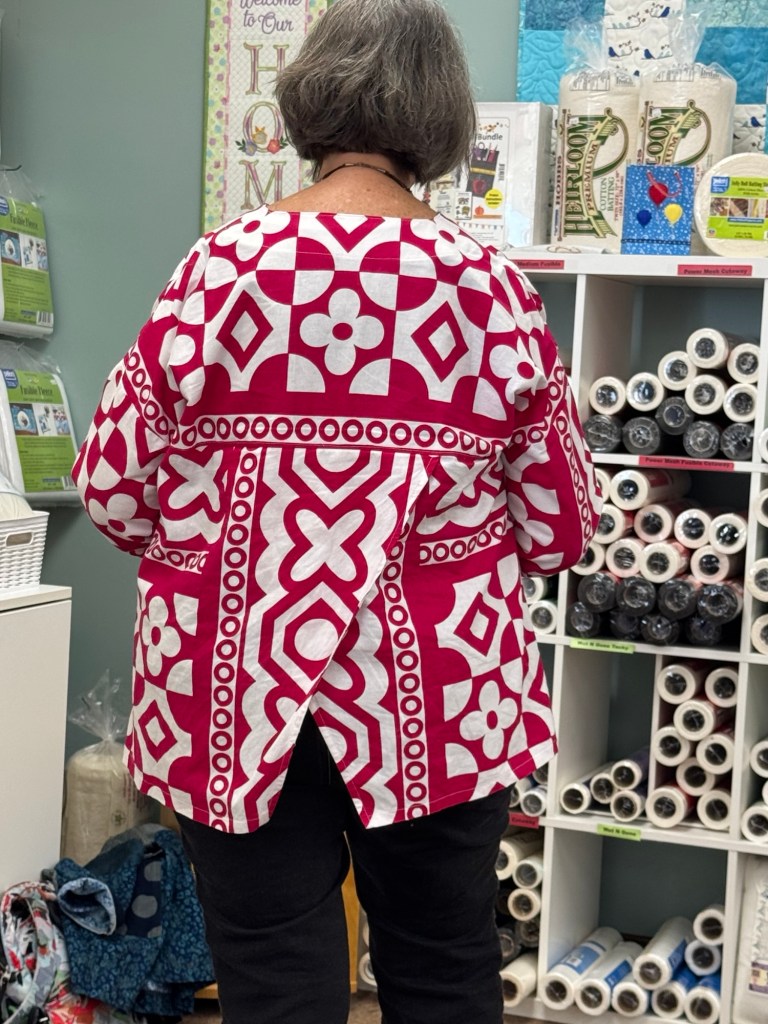
I love this fabric but it was difficult to work with every day. It’s a woven wool gauze so it stretches out as it is handled and sewn and worn. The pattern uses 3/8” seams but I ended up using 5/8” seams everywhere to keep it somewhat in shape.
The fabric frays so much that even serging them seams didn’t work well because the serging just fell off the edge of the fabric on curves. I used French seams on the sides.
I made a 1 inch seam at the “waist” because I didn’t want this to be a dress and I was worried the seam would pull out from the weight of the skirt. I then used that wide seam to insert elastic to help keep the shape of the skirt in place.
The neckline is faced and I used a light weight cotton to help with the shape and to be less noticeable.
I shortened the “cuffs” on the sleeves and made them wider so I could gather them because I thought it would be a better design for the fabric. Instead of tabs to gather up the sleeve length I inserted a casing at the top of the shoulder and ran elastic through it.
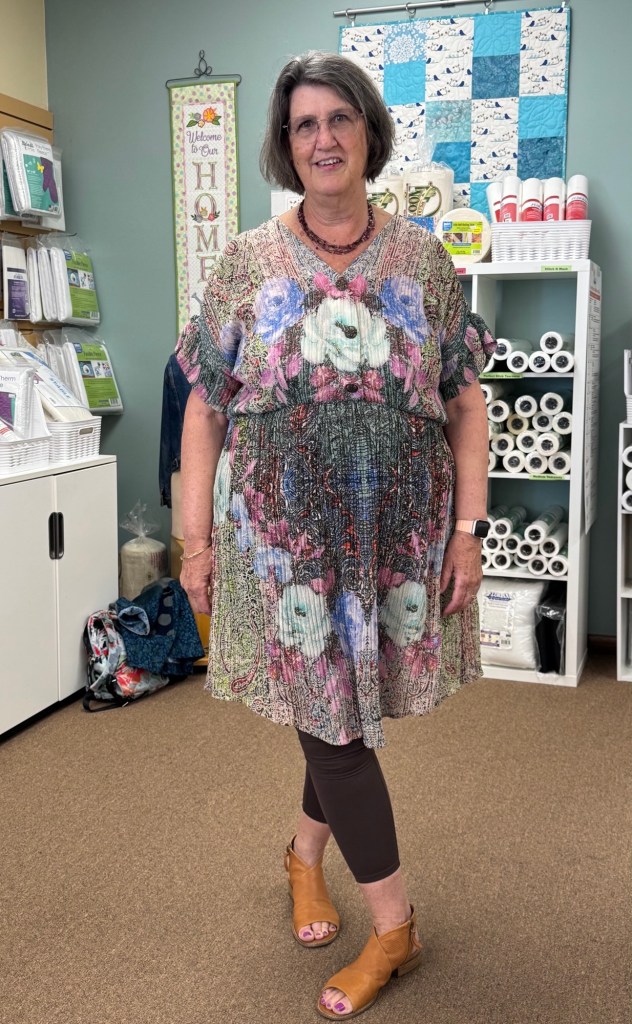
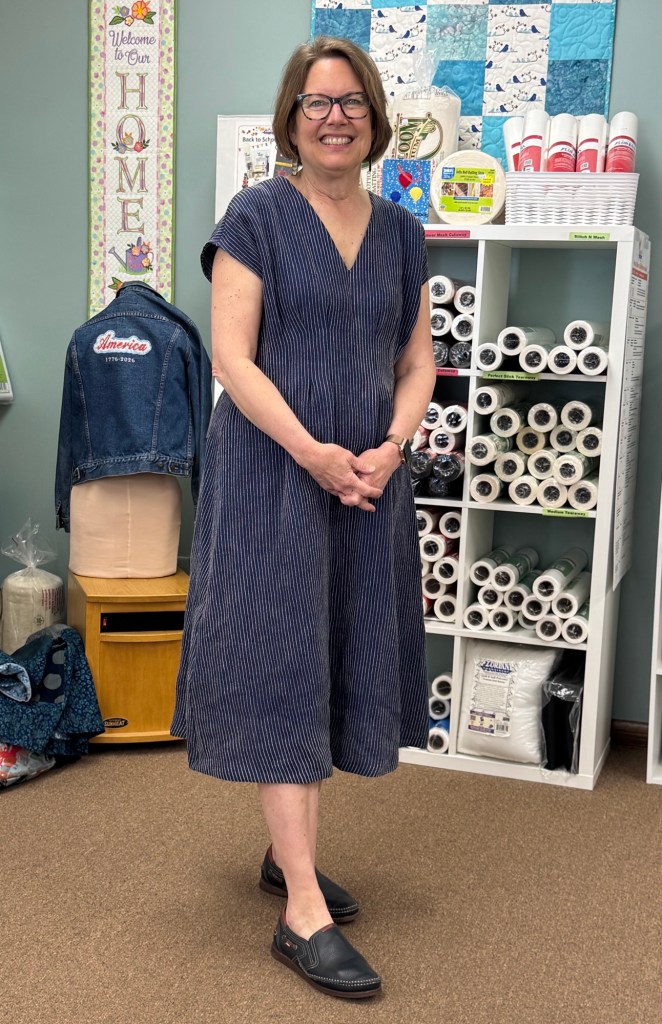
Experimenting with custom printed fabric
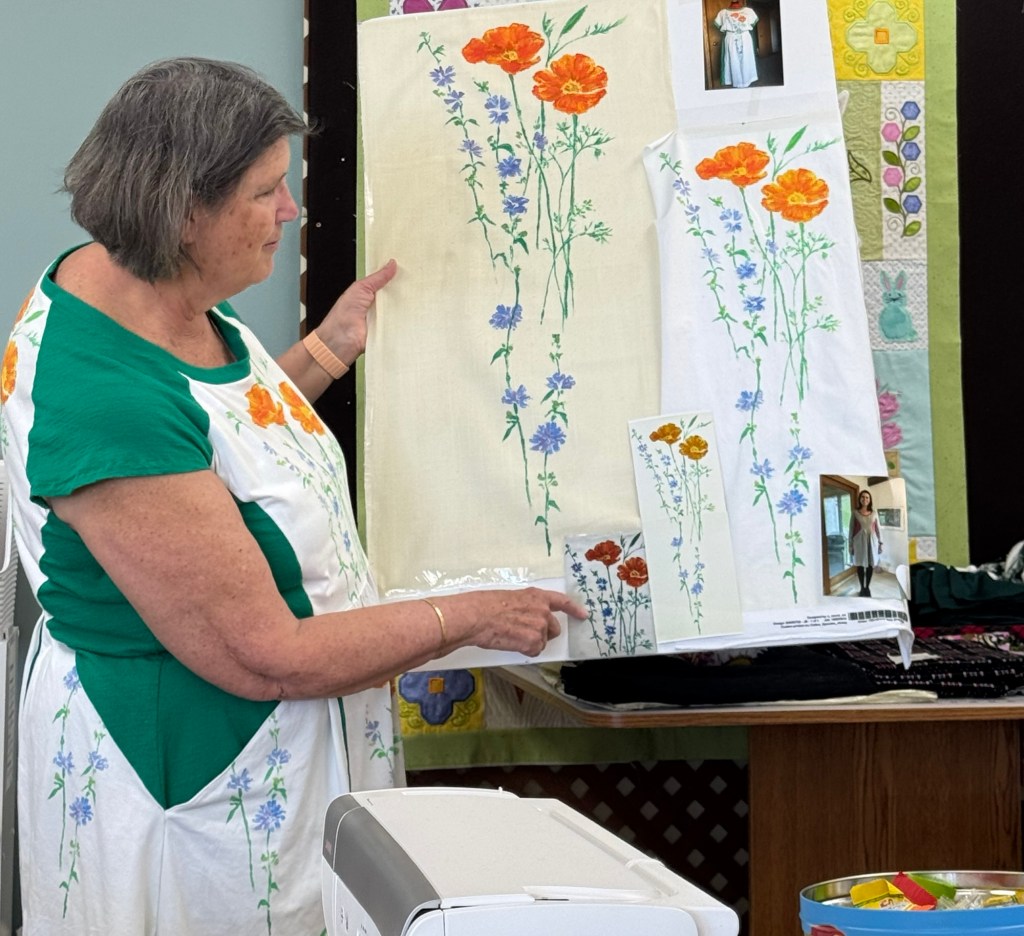
Pattern is Tilly and the Buttons Zadie Dress
Unsurprisingly my mom painted better than Spoonflower prints. The painting works better on the dress she made than on this one.
I kept the shape of the skirt but had to cut the skirt front and skirt back into a center panel and then 2 side panels because the fabric was printed in panels.
This pattern wasn’t drafted for someone with my body shape so I added 2 inches in length of the front and back pattern pieces to account for my chest.
Kristin’s Garments:

Loved the style. Lengthened the sleeves by 2 “ because I didn’t like the straight line created by bodice and sleeve hem. Some attempt was made to match pattern but I’m happy with how it turned out.
Pattern is lined but nothing fancy, I used cotton-made it warmer for spring.
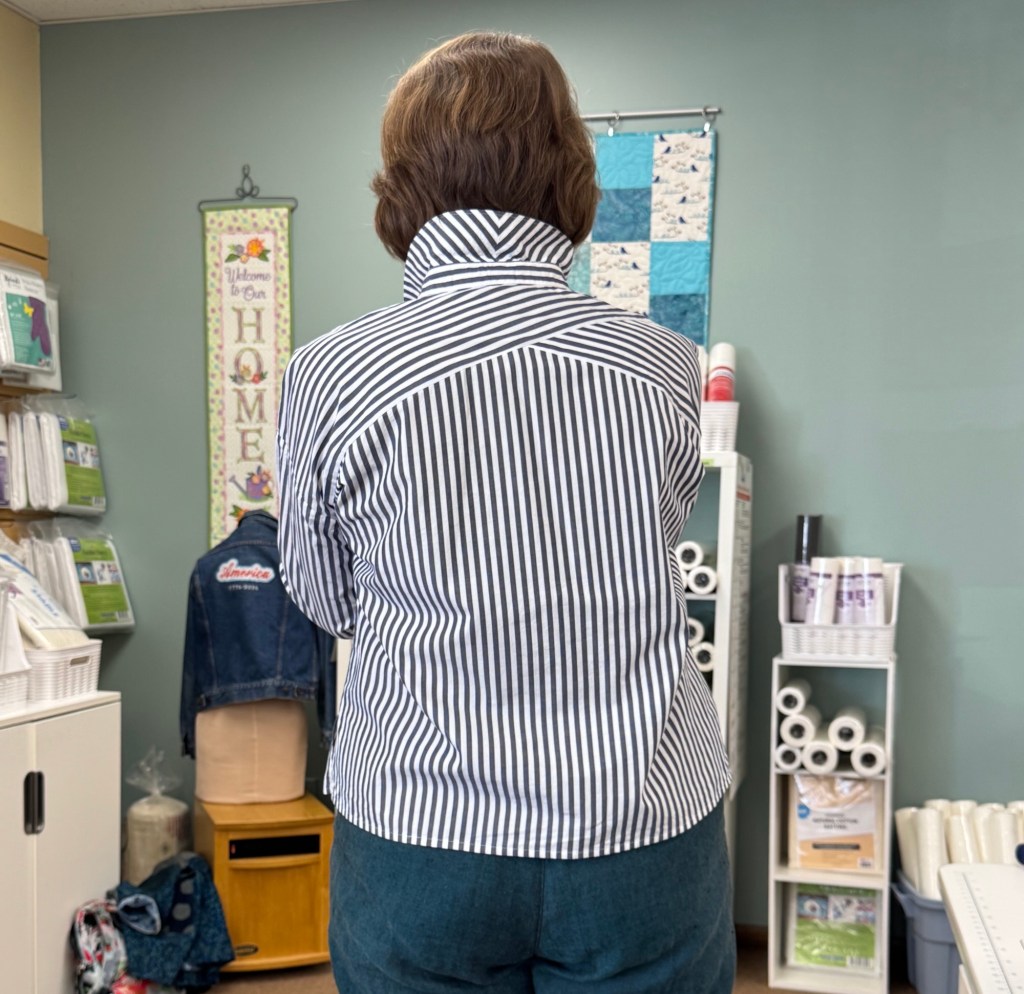
I chose a stripe which made tucks easy to sew-12 in all, ascending and descending.
Back and front have center seam, which I did but placed pattern piece on fold anyway and didn’t cut. Left it pinned and sewed it up-seam finished and still in place!! Works. Great for plaids too.
Length is to pattern-size 12.
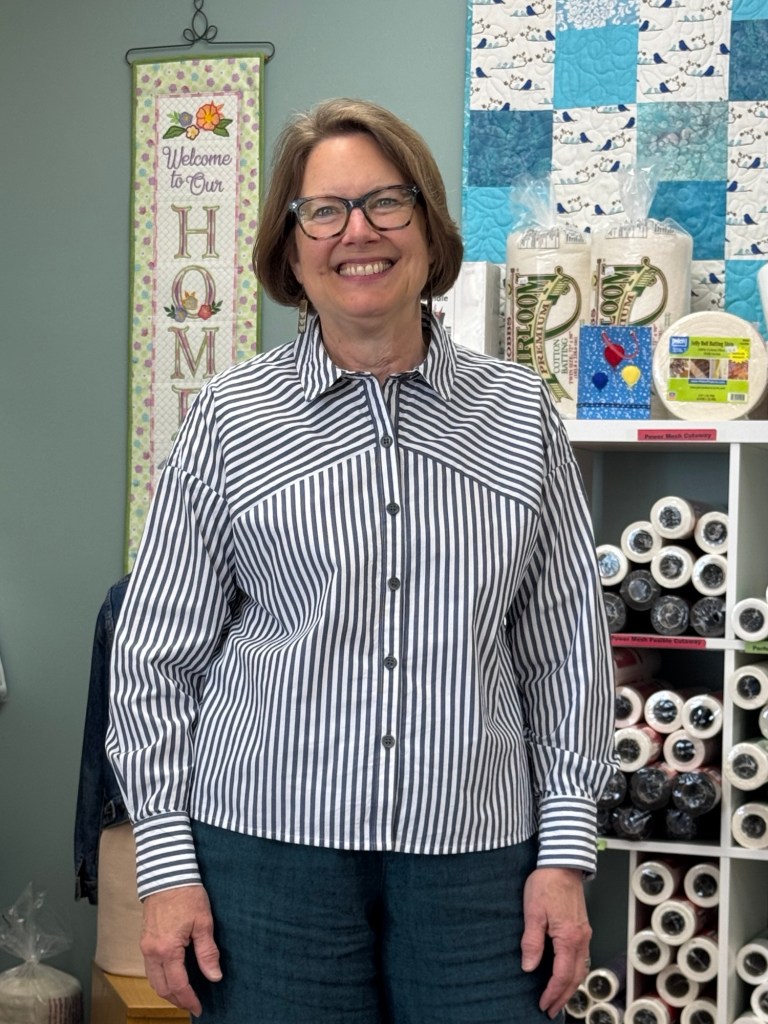
Raised the diagonal line on front bodice under the arm-like it better than original-no dart.
All French seams in the pattern so I went with it. The sleeves were the only things I tried to sew right sides together but I caught myself after 3”-whew!
Collar stand is always a challenge with the curved front-don’t look close!
Buttonholes were a bear-possibly Mettler thread? Needle thread broke twice, then bobbin. Switched to Gutermann? Rip, pray, sew!!
Had to try side slits because of the sewing instructions for French seams. Worked great!
Length is to pattern-I think I’ll add and inch or two next time.
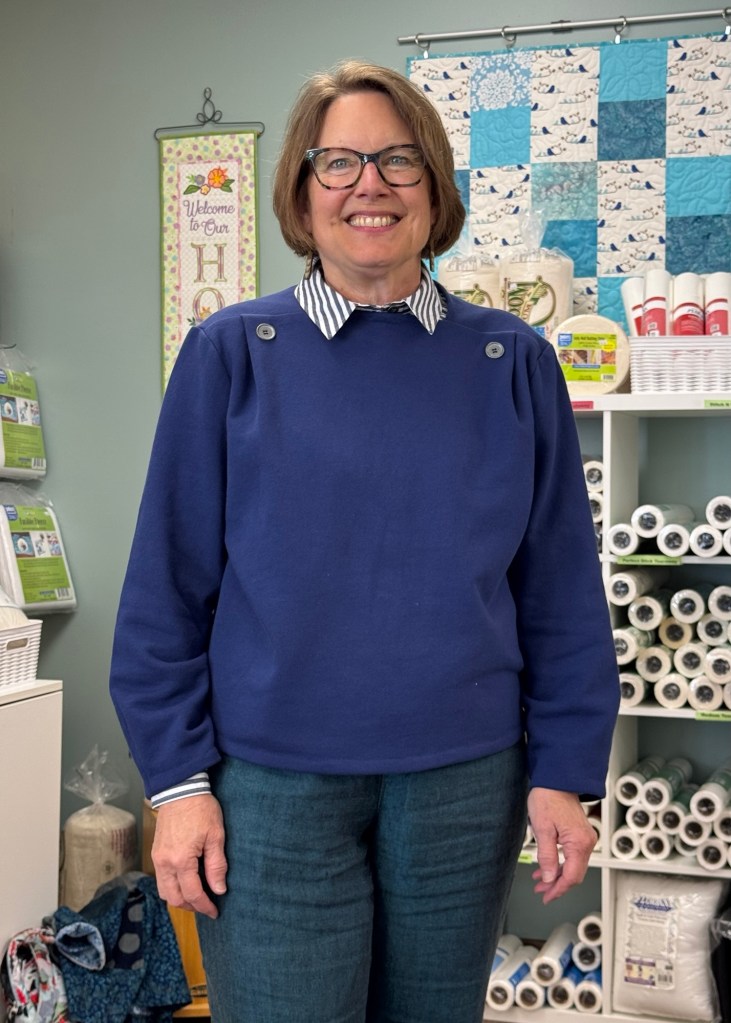
Another wonderful sew from SisterMag! More hand sewing, which is nice on the fluffy French terry. The neck edge fits very nicely but I was surprised that the hand stitching didn’t allow as much stretch as I would like when fitting over head.
Sleeves have darts at wrist for a soft balloon shape. Fun, out of the ordinary sweatshirt!
June-cohost Paulette Finnegan
Wednesday, June 17, Lakes Makerie, Mpls.
Thursday, June 18, Creative Sewing, Apple Valley
Saturday, June 20, Ginny’s, Rochester

I love what you did with the stripes on that shirt!
LikeLike