Runaway-Walkaway

An email from one of our contributors:

Hi Ladies,

Just pushed my kid off the computer! He will be getting HIS tomorrow, in reward for getting a decent grade on the AP US History test. He knows the topic ad nauseum. All I know is that Columbus discovered America and was a great guy! (Reciting that fact gets my kid started on a rant…LOL!)

Okay, now that we know that I know nothing….

Look at this picture of Peggy Sagers pattern #4509 – Run Away Dress (July’s Pattern of the Month). I don’t know about you, but my 1st reaction to seeing this pattern envelope is that it looks like Faye Dunaway in the 1967 flick, Bonnie and Clyde, as Bonnie. Naturally, by calling the dress “Run Away” it sets me up to see the thing in Bonnie’s hand as a pistol, carrying a bag of money, and a smile on her face saying, “One step closer and you’re history!”. Even though I was only 7 years old at the time, Faye was beautiful as ever and, if recalling correctly, wore floppy hats. I can’t shake that 1st image, so yes, Faye is posing for Peggy.

This is the pattern by Butterick that Peggy was copying, the 1952 Walk Away Dress. As Peggy explains in the latest webcast, Butterick came up with this quick and easy pattern that could be cut out at breakfast, sewn in the morning, and walked away in for lunch. (Breakfast must’ve been earlier in those days…say, 5am….) Peggy suggests heavy fabrics, like denim. Butterick suggests lighter weight. Next to the Butterick pattern is MY favorite rendition found on the internet in totally a period design found at http://www.edelweisspatterns.com/blog/?p=1030


Off to sew, until it gets dark. Then, it’s time for Night Time Practice Driving with aforementioned son…he has 9 1/2 hours left to fulfill Minnesota requirements. I never knew that I needed to put my life in danger, in order to get the kid to fly-the-coop….

Kenzie

We Mix It Up in July


Since Treadle was holding kids’ sewing camp on Tuesday, we held Fashion Sewing Club in the store. This shook things up a bit but in the end it seems to have added to our numbers. At least anyone coming in to the store knew what we were about. Over 30 people with more than 5 new people-and some of them brought show and tell.

Kristin headed to NYC to meet the soon-to-be in-laws so Cande Roberts tried her hand at getting up in front and highlighting the garments she made for the month. We really appreciate her efforts and hope you enjoyed the change of face 🙂 Make It Sew had fourteen for the day and then more copies were needed for the Saturday Treadle meeting as new faces showed up there too. Two sewists from Madison had been following us on the website and planned a weekend in the Twin Cities centered around fabric and sewing. The Saturday meeting was on their agenda so they brought garments for Show and Tell and were impressed with our format. Franchise, anyone?

And then just a few pictures from our adventurous students-
Irene brought in a whole sail from a sailboat-I know it doesn’t look like a sail but this is a racing sail-and went home with a bag that she’d seen for sale at a regatta. Of course, she knew she could make it for much less than the price tag.

Just a tee from Target but big satisfaction for a beginning sewist and mom who wants to make special and inexpensive birthday gifts.

Stay cool-move your sewing machine to the basement 🙂

Whirlwind Week; June Club Sheets Online

June Fashion Sewing Club began on Saturday at Treadle followed by a full class of beginning sergers. Mary, the owner at Treadle started the day off right with the announcement that they will be offering Butterick, Vogue, McCalls and KwikSew at a discounted price all the time! You’ll have to check on the start date as there were a few bookkeeping kinks still to be worked out. What a good deal for all of us. Basic Sergery is so satisfying for Debbie and me because students, for the most part, learn a lot and leave feeling much smarter.

A new pattern line you may want to check out

Sunday we drove to Truman, MN (Iowa, as one Club member insisted 🙂 to stay overnight at The Whittler’s Lady Bed and Breakfast so we’d be near Fairmont for our class and trunk show on Monday with the Prairie Star Quilters. The class, Summer Coats, was held in a church and no one did the same thing! We had one Sophia Trench and lots of upcycling of favorite or “too good to get rid of” garments. That might be a good class to try up here.


Tuesday we had a packed house at Treadle. Wednesday we “Focused on Fit” with a basic shell-several full bust adjustments and nips here/tucks there. Thursday was Fashion Sewing Club at Make It Sew; Friday, Sewing With Sheers and Saturday, a full class of Sophia Trenches at Eagle Creek.
All Sophia Trenches except one student made a pillow for her future nursery-and my grandbabies 🙂

Whew! Doing lots of what we love to do. Hope all those who were part of our week had as much fun as we did. Club Sheets are online if you missed it.

I’ve Got the Blues

20120606-163300.jpg
The June edition of Fashion Sewing Club is approaching quickly (first meeting: Saturday at Treadle) and I’m about ready to change the color of thread in my machines. It’s about time but I must say it has been a time saver and most items are matching each other (a new concept for me ;)).

See if you can guess which items match the garments at Club.

On another note, I ran into a Material Girl in the Joann parking lot (no damage ;)) and she turned me on to the Joann Fabric iPhone app. Very simple, it shows you which coupons are current, you download what you want to use (a matter of a second) and you read or show the coupon number to the clerk. No more sifting through old/new coupons. I would like to see a feature that gives me the dates for upcoming pattern sales. Maybe I’ll make a request-or we all can and maybe they’d make a change!

I don’t wear ruffles!

From our California Material Girl…

That’s what I told Kristin when she suggested that I try on a dress that had been made for club. The dress had a large ruffle that went around a scoop neckline – Kristin may remember better than me the details. But all I saw was a large ruffle and being 5′ 3″ – it looked like I could be swallowed up by it! What would have been more accurate for me to say is, I don’t wear large ruffles – I know, silly rule – but don’t we all have some clothing rules? So, now that I’ve confessed to putting my foot in my mouth – here are a couple of garments where I’ve recently added ruffles to necklines.
I feel like there have been two large trends out there for awhile now – ruffles or the drape front look. I’m not much of a drape girl – again small in stature, I feel a bit enveloped by too much drape. I figure I can add a ruffle to any garment and keep it within my comfort level.

So, the first is a cardigan. This is the basic Kwik Sew pattern – once you get it fitted to your shoulder, arm and torso length – you’re good to go, add or change whatever you want- it’s easy with this pattern. I pulled the ruffle piece from Simplicity 2256. I had in mind this lush, double sided, purple knit that I picked up on the Sillouette NYC Fabric trip. I wanted some way to show off both shades of the fabric and I thought a ruffle could do that nicely. The ruffle from the Simplicity pattern was the perfect length and shape, the only adjustment I made was I wanted the edges to be left raw. I followed the pattern’s direction for construction of the neckline ruffle and I have to say – it was very difficult to gather two layers of knit fabric with a seam down the middle. If the fabric was any thicker I don’t know how you would do it. The instructions basically have a seam down the middle of the ruffle and your gathering stitch goes right along side that. After several attempts using a basting stitch on my machine, which kept breaking when I would try to gather the ruffle – I finally hand basted a gathering stitch. This was the most difficult part of the project. Once I had the gathering done, I just had to sew the ruffle to the finished neck line. Easier said than done – again I hand basted the ruffle to the neckline because it got “squirly” with the thickness of the ruffle – and not being able to see where you were attaching the ruffle to the neckline as you were sewing. My finished stitch line along the neck line is not so straight on the inside of the garment – but on the outside you can’t tell. In the end, I’m very happy with the finished cardigan. (the shell underneath is another NYC fabric. I used McCalls 5818- and turned the dress into a shell)

Next is a great tried and true Jalie pattern. I found this crazy fabric online – the description noted that it had a snake skin pattern – when it arrived it didn’t look exactly as I remembered. It was a bit crazier with pattern and color than I expected. I saw a top in a catalog with the flounce bottom and a ruffle around the top. I thought it would be easy to add a ruffle to this Jalie neckline. Well, the first thing I noticed after making up the top is that the Jalie version has a twist neckline and the RTW version did not have this added complexity. The other big difference I realized was that the Jalie pattern has a dipping neckline in the back – unlike the RTW which had a normal round neckline in back. Since I planned to use the Simplicity ruffle pattern again – it would not fit around the back neckline – it was too small and I had already cut it out leaving not enough fabric left over. So I figured I’ll just run a ruffle from the neck to the bustpoint – that didn’t work out so well. In the end I think the ITY jersey I used was too heavy to create a nice full ruffle – it just wanted to lay flat. So, I decided flat it is, and I made my ruffle into a flounce. I used the same pattern piece that is used to create the flounce down the midriff – cut it down a bit in width and added it to the neckline. I had to take out my shoulder seams and top stitching to have the ruffle start at the shoulders. I like the top and now I would be able to make this again quickly. I’d still like to make a version close to the RTW inspiration – but that will have to wait, other projects already ahead of that idea!
P.S. one little tip – lately I’ll carve out some sewing time and cut out 2 or 3 patterns in one setting. Then I have projects ready to go when I have the time to sew – I’ve found that helpful ; )
Both tops were inspired by Cabi – here is the inspiration and my version:

Dress Forms Revisited-New Joann Fabrics Open

Peggy Sagers had over 300 people watching Monday night as she unveiled the new dress form she is offering on her website. It looks great and the price seems very reasonable, considering a custom dress form can easily cost $1000. The problem with a purchased dress form is that it doesn’t look like most of us-well, most of the Material Girls anyway. Someone has to be a standard size in order for one to exist but I don’t bump in to Ms. Standard Size often. Peggy had some tips on padding the dress form to look like your body-she fit a sheath dress to her body and then put on the dress form to aid in padding the dress form so it would be her double.

All of this led to a phone call I received this morning so I thought I’d put in a plug for a duct tape dress form-wrapped by yours truly, of course. Just kidding, I am linking our instructions so you can do it yourself. Either way-purchased dress form or duct tape, some work has to be done to get the form to look like your body so you can use it to fit garments. This was the reason we started doing the duct tape dress form to begin with. No matter what price I pay for a dress form, I have to do some shape shifting to be accurate and that takes time and probably another pair of eyes.

So here’s the deal, for $125 you come to class (or we can come to you and 3 of your friends in your home), we have the supplies and you bring a tight fitting garment that covers the part of your body that will be wrapped (neck to thighs). We wrap you in three layers of tape, cut it up the back to get you out and after lunch we will tape it back up and stuff it. You will go home with a body double that will hang in your closet or sit on the floor or a table. We take measurements as we go to keep things accurate and draw helpful points on your double to aid in fitting.

We don’t guarantee that it will be exact but you would be surprised at how the duct tape captures posture, etc. If you put close fitting garments on the dress form you will be able to see how tight or loosely you will fit garments as you make them.

It isn’t my intent to suggest that you shouldn’t buy a dress form from Silhouette Patterns, merely that there are other options. The next Duct Tape Dress Form class at Treadle is Aug. 1 or you can email Material Girls and set up a taping party at your convenience.

Joann Fabrics in Shakopee is open!!

Those of us that live on the southwest side of the Cities have been watching and waiting for the opening of the brand new store. I had to go today-the first day they opened-just to check it out. I was very happy to see a well-lit, visible classroom right inside the front door. There’s a Viking/Husqvarna dealership in back and the whole store is basically divided in half by a center aisle with fabric on the right half and sewing machines, patterns, notions and crafts on the left. Yes, about 3/4ths of the store is dedicated to sewing!

I talked to the manager and she is excited about offering classes-the old store had no visible classroom-neither does the store in Yorktown and the buzz among customers was one of excitement at the opening of a new place for sewists to shop. Everything was neat and tidy, the displays more at eye level-not much bending over to see things. The handicapped parking spaces are right outside the door so you don’t even have to cross traffic to get in the store-how thoughtful.

As I drove home I thought of one thing the classroom needed-a changing corner for trying on garments as you sew 🙂

May Club Notes

First there were girls’ dresses and such-


The rain capes are Raindrops by Fig Tree http://www.figtreeandco.com and fit sizes 4 – 10. Very popular.

and then there were shoes 🙂

and if one pair isn’t enough, here’s an article featuring the ten best low heels you need to own.
and wonderful garments (and not all at Treadle either but I didn’t do a very good job of capturing them on camera…

We promoted Bundles of Love and would like to pass on a quote from Opie, who never quite seems to make it to Club but is a faithful online follower (the May Club Sheets and Garment Photos have been added to the website.)

“Re “Bundles of Love” – as a nurse in one of the intensive care nurseries at Children’s Hosp of Minneapolis, I can attest to the wonderful benefit of these contributions – the mothers are truly touched – for many babies, these will be the only new – and certainly the only handmade – items they will ever receive! On behalf of the other nurses, I want to say Thank You to the women (and men?) who make this possible! Opie”

Thanks to all who attended Club and happy sewing!!

April Club Show and Tell

Club sheets and photos for April have been posted to the website under”Club Sheets/Garment Photos”. We were so pleased with attendance this month, given the fact that we made our major change from Hancock to Make It Sew. Make It Sew had coffee brewed Thursday morning and a cut of their wonderful knit for door prizes. Show and Tell was also robust at Make It Sew. Thanks for being so loyal to the 16 of you who came!

Treadle attendance on Tuesday morning hit a high of 28 and the Saturday morning meeting has caught on with 14 attending.

Here are a few highlights from Show and Tell. We also saw beautiful garments but they’re not as easy to catch on camera. I’ll try to get better at that.

Wool Coat Class Participant

What to do with husband's old football jersey-a bag!

Amy Butler Barcelona Skirt made 3 times!

Many of you are sewing for babies

Happy Sewing!

Coffee Break Perusing

Guest Post from Kenzie Carlson

Dear Sewists,

Here are a few examples of how I use Pattern Review (patternreview.com).

I’m having a great time experimenting with making knit tee’s in a non-bias fashion using the bias Burda pattern 7509. I wondered if there’s a simple men’s tee pattern…not that I want to switch gears to make something for my husband at this time. So, I looked at Pattern Review during my coffee break from sewing.

I found this posting that has directions on how to make a design on freezer paper, iron it to the shirt, and spray paint. Now, how cool is that!

I noticed that this sewer has 85 reviews, so I took a look to see what other creative things she has:

Then, THIS Amy Butler bag took my eye because MOST Amy Butler bags are made with colorful quilting material. This had wording and looked different! Turns out, it’s made with rice bags, plus there’s an inside insulated pocket for refrigerated items when using for market purchases. (This is a very creative sewer!!)

Weeks ago, killing time looking at Accessories on Pattern Review, I came across this Obi Bag from Sewing Workshop. Turns out the pattern is OOP, but by reading the reviews, I think I can duplicate it. I found material and it’s in the hopper, waiting to be made.

This sewer has 60 reviews and here’s more inspiration to tack onto my “to do” sewing list:


As I’ve mentioned before, daily (usually!), I scan the Review Gallery (under Sewing Reviews on the home page, 1/2 way down the left side) for inspiration. Pattern Review has a variety of garments and you never know what will be posted.

I look at other websites/facebook, too, such as Tilton and Sagers, which are wonderful for ideas especially on different looks for one pattern; how to change things up to get the most out of one pattern. To me, this is extremely important because the pattern work of fitting is the most time consuming. Once something fits (darts in right place, shorten/lengthen lines adjusted, etc), then the fun can begin!

Coffee break done – back to sewing!

First Time at Textile Center Garage Sale

Guest post from Kenzie Carlson to brighten a dreary Monday morning-

Good Morning, Ladies!

Thank you for the announcement of the Textile Center Garage Sale! Otherwise, I would not have known anything about it!

Yes, I did go and spend the whole day there, subsisting on the mere rations I brought along (2 granola bars and a water bottle…who knew that the years of scouting, alongside my son, were the training grounds for the Garage Sale?!). I thought enough ahead to bring ex-large and ex-small reusable shopping bags…and a strategized list of items to focus on – no willy nilly purchases today!! This would be a good place to look for those OOP (out-of-print) patterns as seen on my late night browsing on Pattern Review, fabric for those upcoming designs, notions of needed things, and reference materials.

I arrived around 8:00ish, paid a buck for parking and received a $2-off coupon for the Garage Sale and $3-off for the Reuse It Center. Stuffed those in my wallet and forgot about them…onto the Sale!

There were tons of things everywhere-in boxes on tables, under tables. I rummaged through tables (and under) of patterns dated from today back to the 50’s. 10 patterns for a buck! Likewise for books and magazines in display and price. Unbelievable heaps of fabric in every type of fiber content possible…expensive silks, wools, to scraps of leftover craft projects. Honestly, it got easier to look through the material after folks picked the top layer off. Some fabric came from a loving home as it was carefully wrapped in ribbon or string to endure the strains of the Garage Sale. (I had notes attached saying the fabric was machine washed and dried before storage!) Other fabric seemed to be happily rid of the previous life of some gone-wrong project as it was only circumferenced in masking tape and nearly falling apart. The notions were an extravagance of a multitude of junk drawers with everything possible co-mingling in boxes, on tables and underneath.

I slowly went through patterns, books, notions, fabric-once. Then, after a granola bar/water break, dove in for a second time!

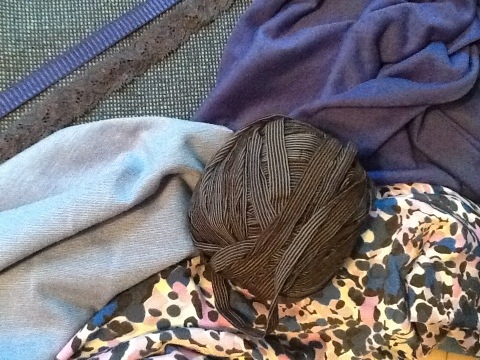
At 2pm, I made it through checkouts and s-l-o-w-l-y hauled my overheaped, over weighted bags to my car. Since it was so close to the 3pm $1-bag sale, I was off to join that line. I overheard the party of 3 ahead of me (looked like an older-than-me couple with their college-aged daughter). The mom instructed strategy assignments to the other 2 on the impending break-loose bag sale and distributed HER OWN brown paper grocery-sized bags (no need to waste time stopping for bags!). “Okay, stay away from UFO’s, unless they contain LARGE balls of yarn!” Wow, what a good tip!! I had passed by the UFO’s (unfinished projects) because why would I want someone else’s bad karma projects?? Who thought to look through them for goodies??

Standing there for almost an hour, I realized there was a $2-off coupon in my wallet that I’d forgotten about! In the spirit of strategizing as did the threesome ahead, I decided to limit my fabric intake to the two bags covered by the $2-off coupon. I didn’t need to become a hoarder. I didn’t need to take ANYTHING that fit into my bag just because it was a buck. What I really wanted was 4 yards of Treadle silk fabric, originally priced $120 for $40, that everybody walked passed, unnoticed. I couldn’t decide if the mustard plaid gorgeous fabric would be the right color for a coat. Since I couldn’t decide when the fabric was close at hand, I thought to wait until the bag sale to see if fate was on my side.

Fate was not on my side. I’m still mourning the loss, but still can’t decide if the color was right. (Sounds like a bad teenage relationship….)

But, I did find some wonderful fabrics!! Since I didn’t really know what to take, I started going for the large yardages thinking, if nothing else, they would make good muslins. After going through the frenzy of gathering, I carefully packed my limited 2 bags and presented the $2-off coupon to the cashier. Yes, he accepted the coupon and the bags were FREE!!

Some of the things I ended up with, costing $25:
– 13 patterns, including a Marcy Tilton and a Silhouette;
– 17 books and Threads Magazines;
– 25 pieces of fabric yardage, including the free $1-bags;
– 4 packages of sewing machine needles, including twin and spring;
– 1 spool of ribbon;
– several sewing machine presser feet (some fit my machine, some didn’t)

I spent the evening pouring over the Threads Magazines, ripping out “valued” articles at a coffee shop in St. Paul until 9pm, then in my car until 11:30pm. Who knew that I was the ride for my son and his friend to a metal concert, to enjoy 3 bands I never heard of…. Yes, it took that long to go through the stack of Threads!

Sunday, everything got laundered, ready for sewing. When I pre-wash, fabrics go through a machine wash (regular cycle with soap) and machine dry. After the garment is made, they never see the dryer again as does the RTW in the house (except jeans). Each fabric is cataloged on a 3×5 card, including measurements pre- and post-washing, and post-drying. It’s a good indicator for fabric content. (Oh, I also toss a dye-catching sheet in the wash to give some sort of indication on the amount of dye lost in the wash.) The dry-clean-only got the washer treatment, too, because I don’t want to dry clean. The fabric is folded (and some cases, ironed) after the dryer. Surprisingly, it took all Sunday to do just this! (Thank goodness, I stopped at TWO $1-bags!)

Today, I’ll pick up my pin-head-sized sewing studio (nobody has a “sewing room” anymore….) of past project fabric laying around and incorporate the newbies into storage. The stack of my current project focus (t-shirts, blouses) grew immensely. I can hear the call to create!

Again, thanks for sharing info on the Garage Sale!